Anti-slip epoxy paint
What is anti-slip epoxy paint?
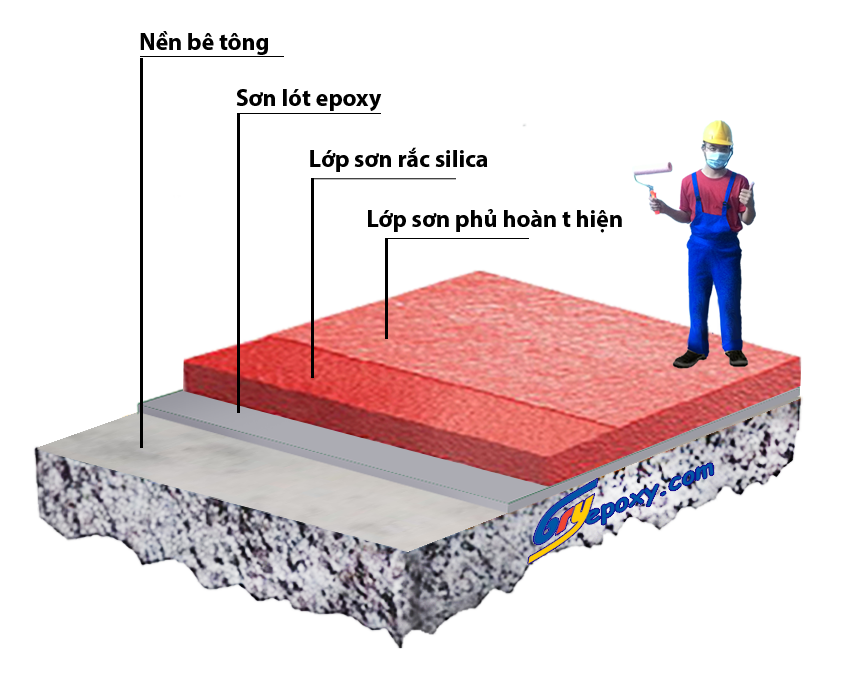
Anti-slip epoxy paint is an epoxy paint with added quartz sand particles. These rough particles are often mixed or sprinkled on the paint surface when the paint is still wet. Along with the bonding of epoxy paint, quartz sand will adhere and form a rough, anti-slip surface.
Advantages and Disadvantages of anti-slip epoxy paint:
- Advantages:
– Anti-slippery at locations that often go back and forth, need to reduce the speed of the car … As a slope up and down the basement …
– Good bearing up to 16T
– Waterproof, oil absorbent, good chemical environment resistance
– Antibacterial, dust resistant
– Various colors, high durability
- Defect:
– High price
– Need skilled and skilled construction workers
– Difficult to repair if damaged
– When executing the sand needing to be applied manually, the construction method is complicated and requires a team of 7 workers to be able to proceed …

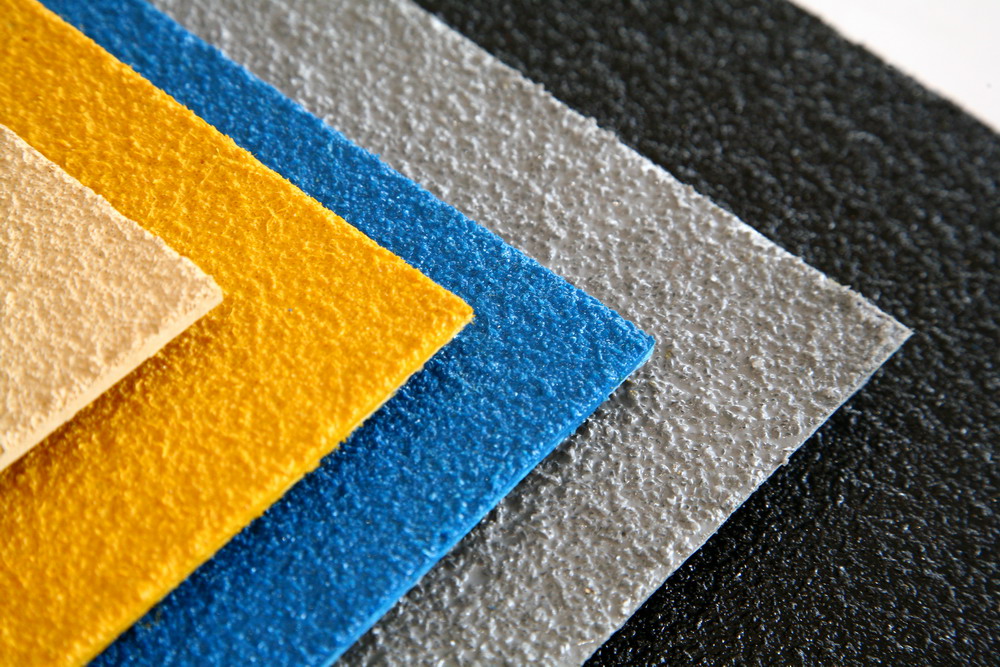
Sample some colors of non-slip epoxy paint when painted on the floor:
Where appropriate to use:
– Slope up and down in the basement, parking lot, where water is often scattered like kitchen, processing area of agricultural, forestry and aquatic products, where there is a risk of slippery, …
– The area often walks like a basement walkway …
Anti-slip paint to provide a slippery anti-slippery solution when there is water or high-risk sliding locations for the floor when painted, and ensures safety for those who move on.
Any questions about epoxy anti-slip paint or epoxy floor coating quality please contact: 0904 704 969
Công việc thi công sơn epoxy chống trơn trượt đòi hỏi các công đoạn tỉ mỉ mới có được kết quả công trình đẹp

Quy trình thi công sơn epoxy gồm 12 bước cơ bản
Bước 1: Mài nền bê tông
- Tiến hành mài nền bằng máy mài công nghiệp đi kèm với máy hút bụi công nghiệp để có bề mặt tương đối bằng phẳng, loại bỏ chất bẩn bám trên nền, lấy lại cốt nền ở những nơi cần thiết.
- Mài góc, chân tường, loại bỏ những vụn hồ, vụn bê tông để có được khối bê tông hoàn hảo hơn.
- Loại bỏ dầu mỡ, hóa chất bằng chất tẩy rửa chuyên dụng, đèn khò gas cỡ lớn.
- Hút bụi, làm sạch lại toàn bộ bề mặt nền
Bước 2: Trám trét
- Sơn lót trước những vị trí cần trám trét
- Trám trét những khuyết tật lớn của bề mặt bằng putty chuyên dụng đóng rắn nhanh.
- Mài lại những nơi trám trét, kiểm tra lại toàn bộ bề mặt để có bề mặt tương đối bằng phẳng.
- Hút bụi, làm sạch lại toàn bộ bề mặt nền
Bước 3: Thi công sơn epoxy lớp lót
- Lớp sơn lót epoxy ngấm sâu vào nền bê tông hình thành một lớp composite bền vững, tăng cứng bê tông, tạo liên kết tốt giữa nền bê tông và lớp sơn phủ. Thi công theo phương pháp lăn, gạt hoặc phun.
- Dùng cọ quét vào những vị trí rulo không chạm tới được như gầm máy, chân tường
- Lớp sơn lót phải được phủ kín bề mặt, những vị trí quá hút sơn lót cần được dặm vá bằng sơn lót thêm một lần nữa.
Bước 4: Thi công sơn epoxy phủ nước 1
- Sau khi sơn lót khô (>1tiếng) Thi công tiếp lớp sơn phủ epoxy có màu thứ nhất. Lớp sơn này phải sơn thật đều và kín màu toàn bộ nền bê tông.
Bước 5: Bả sửa lại bề mặt
- Sau khi tiến hành thi công sơn epoxy màu, những khuyết tật của bề mặt lộ rõ hơn. Tiến hành cào tràn sơn tự san phẳng để đảm bảo lấp toàn bộ lỗ nhỏ trên bề mặt, dù là nhỏ nhất như đầu que tăm. Đây là bước cực kỳ quan trọng đảm bảo tính thẩm mỹ của sàn bê tông.
- Trám trét bổ sung những vị trí khuyết tật sâu, rộng bằng putty. Mài lại bằng máy chà nhám băng
Bước 6: Chà nhám bề mặt
- Dùng máy chà nhám cỡ lớn chà tạo nhám và loại bỏ toàn bộ những hạt sạn, hạt cát bám dính trên bề mặt sàn epoxy.
Bước 7: Kiểm tra
- Kiểm tra lại toàn bộ sàn bê tông, Nếu chưa đạt thì quay lại bước 5
Bước này BRYepoxy đánh giá là cực kỳ quan trọng. Vì sau bước này công việc sửa chữa sàn để đạt thẩm mỹ cao nhất khó khăn và tốn kém hơn.
Bước 8: Thi công tiếp lớp sơn phủ epoxy rắc cát.
- Thi công lăn hoặc phun toàn bộ bề mặt lớp sơn epoxy cuối cùng. Lưu ý trên một mặt phẳng không nên thi công 2 lần để tránh màu sơn khác nhau.
- Dùng cọ quét góc, chân tường những vị trí rulo không chạm tới được
- Tránh lăn, phun vào tường, lăn để lại vệt rulo
- Tiến hành rắc cát thạch anh cùng cỡ hạt đều tay kín khắp mặt sàn khi lớp sơn còn ướt.
Bước 10: Vệ sinh bề mặt sàn
- Vệ sinh,hút bụi loại bỏ những hạt silica tạo nhám không bám dính tốt dưới mặt sàn
Bước 11: Thi công lớp sơn phủ epoxy cuối cùng
- Thi công lăn hoặc phun toàn bộ bề mặt lớp sơn epoxy cuối cùng. Lưu ý trên một mặt phẳng không nên thi công 2 lần để tránh màu sơn khác nhau.
- Dùng cọ quét góc, chân tường những vị trí rulo không chạm tới được
- Tránh lăn, phun vào tường, lăn để lại vệt rulo
Bước 12: Kiểm tra lần cuối
- Kiểm tra lại toàn bộ bề mặt nền sau khi thi công để đảm bảo yêu cầu kỹ thuật, mỹ thuật...trước khi bàn giao cho chủ đầu tư.
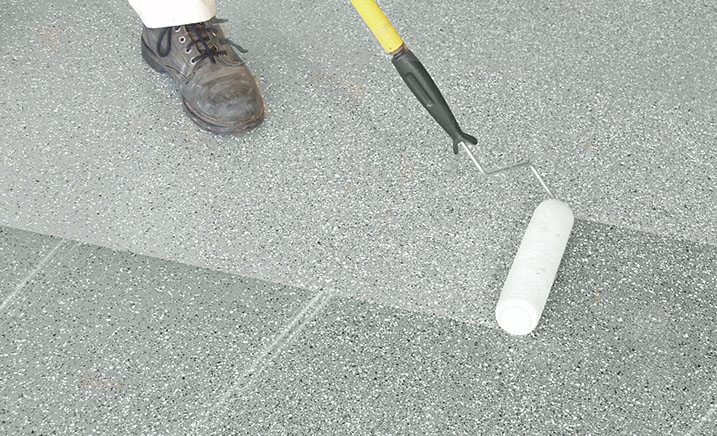
Thi công sơn epoxy chống trơn trượt cần phải được làm đều tay ở tất cả các công đoạn, lớp phủ epoxy được tiến hành bằng chổi sợi ngắn, rulo epoxy gốc dầu hoặc sử dụng phương pháp phun chân không. Sử dụng kính, găng tay, mặt nạ phòng độc, đồ bảo hộ để đảm bảo an toàn khi thi công.


